Use a command button to start an action or a series of actions
You use a command button on an Access form to start an action or a set of actions. For example, you can create a command button that opens another form. To make a command button perform an action, you write a macro or event procedure and attach it to the command button's On Click property. You can also embed a macro directly into the On Click property of the command button. This makes it possible to copy the command button to other forms without losing the functionality of the button.
What do you want to do?
- Add a command button to a form by using a wizard
- Create a button by dragging a macro to a form
- Create a command button without using a wizard
- Customize a command button
Add a command button to a form by using a wizard
By using the Command Button Wizard, you can quickly create command buttons that do a variety of tasks, such as closing the form, opening a report, finding a record, or running a macro.
- Right-click the form in the Navigation Pane, and then click Design view on the shortcut menu.
- On the Form Design tab, in the Controls group, ensure that Use Control Wizards is selected.
- On the Form Design tab, in the Controls group, click Button.
View or edit a macro embedded in a command button
- In the Navigation Pane, right-click the form that contains the command button, and then click Design View
or Layout View
The Macro Builder is displayed, showing the action or actions that make up the embedded macro.
Create a button by dragging a macro to a form
If you have already created and saved a macro, you can easily create a command button that runs the macro by dragging the macro from the Navigation Pane to a form that is open in Design view.
Open the form in Design view by right-clicking the form in the Navigation Pane, and then clicking Design View
For more information about creating macros, see the article Create a user interface macro.
Create a command button without using a wizard
You can create a command button without using the Command Button Wizard. The process involves placing the button on the form and then setting a few properties.
Right-click the form in the Navigation Pane, and then click Design View
Description
By default, Access gives a new command button the name Command, followed by a number; for example, Command34. Although it is not required, it is a good idea to change the name to something that reflects the function of the button (for example, cmdSalesReport or CloseFormButton). This helps you later, if you need to refer to the button in a macro or event procedure.
Type the label that you want displayed on the command button. For example, Sales Report or Close Form.
Note: The caption is not displayed if a picture is specified in the Picture property.
Use this property to specify what happens when the command button is clicked. To set the property, click in the property box and then do one of the following:
- To make the command button run an existing saved macro, click the drop-down arrow and click the macro name.
- To make the command button run an existing built-in function or VBA function, type an equal sign (=) followed by the function name; for example, =MsgBox("Hello World") or =MyFunction(arguments).
- To build an expression, click
and then click Code Builder.To build a new embedded macro containing the actions that you want the command button to perform, click
and then click Macro Builder.
Note: Access databases which contain VBA code must be granted trusted status before the code can be run.
For help with other properties not mentioned here, place the cursor in a property box and press F1.
Customize a command button
Access provides many ways to customize command buttons so that you can have the appearance and functionality you want on your form. For example, you can create a row of command buttons in a tabular or stacked arrangement, or you can make command buttons appear more like hyperlinks.
Right-click the form in the Navigation Pane, and then click Design View
- Create a horizontal (tabular) or vertical (stacked) layout of command buttons You can add command buttons to a tabular or stacked layout to create a row or column of precisely aligned buttons. You can then reposition the buttons as a group, which makes it easier to modify forms. You can also apply formatting styles to the entire row or column of command buttons at the same time, and you can separate the buttons by using grid lines.
- Right-click one of the command buttons that you want to add to the layout, and then point to Layout on the shortcut menu.
- Click Tabular
to start a horizontal row of buttons, or click Stacked
to create a vertical column of buttons. Access draws borders around the command button to indicate the layout. Each button is paired with a label that you cannot delete — however, you can shrink the label to a very small size, if it is not needed. The following illustration shows a command button and its associated label in a tabular layout. Note how the label is in the next higher section — this keeps the labels from repeating for each detail record.
The following illustration shows a command button and its associated label in a stacked layout. In a stacked layout, the label and the button are always in the same section.
When you release the mouse button, the control is added to the layout.
- Select the command button.
- Click either Move Up or Move Down on the Arrange tab. The command button moves up or down to the next section, but remains within the tabular layout. If there is a control already in the position that you are moving this control to, the two controls exchange places.
Note: The Move Up and Move Down commands are disabled for stacked layouts.
- Click any of the command buttons in the layout. A layout selector appears at the upper left corner of the layout.
- Drag the layout selector to move the layout to a new location.
- Select any of the command buttons in the layout.
- Click the Gridlines command on the Arrange tab, and then click the style of gridlines you want.
Note: Setting a command button's Transparent property to Yes is not the same as setting its Visible property to No. Both operations hide the command button, but setting the Transparent property to Yes leaves the button enabled. Setting the Visible property to No disables the button.
Make a command button appear as a hyperlink If you want, you can hide a command button but leave the caption visible. The result is something that looks like a label, but functions as a command button. You can also underline the text in the caption and change its color to make it appear as a hyperlink.
- Click the command button to select it and press F4 to display its property sheet.
- On the Format tab of the property sheet, click in the Back Style property box.
- In the drop-down list, select Transparent. The body of the command button is hidden, but its caption remains visible.
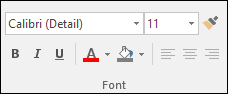
- To underline or change the color of the text in the caption, use the tools in the Font group on the Format tab.
Note: For a form that allows irreversible operations (such as deletions), it is a good idea to make the Cancel button the form's default command button. To do this, set both the Cancel property and the Default property to Yes.
to open the Picture Builder.
- Add a picture to the command button by using the procedure outlined earlier in this section.
- Select the command button. If the property sheet is not already displayed, press F4 to display it.
- On the Format tab of the property sheet, type the caption you want in the Caption property box.
- Click the drop-down arrow in the Picture Caption Arrangement property box, and then select the arrangement you want. For example, to display the caption below the picture, select Bottom. To display the caption to the right of the picture, select Right. To make the arrangement dependent on the system locale, select General. By using this setting, the caption will appear on the right for languages that read from left to right, and it will appear on the left for languages that read from right to left.
